Bikini Gardener Update: XMas Holiday Vacation Edition


I am leaving on a jet plane and the fruits of my labour are being left to a few trusty friends to enjoy for themselves.  (What a great kind of garden, eh?!  I do all the work, you get all the joy!)  I planted early November just as I always do, but unlike usual, it was an incredibly rainy month and my little seeds sprung into action right out of the gate.  It’s crazy how unbelievable fast my garden grew this season and it’s ready (many plants) for harvesting.  I did not plan for the rain!  How can you?  So my goods are ready two weeks ahead of time, just in time  for my departure for the Christmas Holidays.  Wouldn’t ya know it!  My Irish luck!

I snapped a few pics of what I am leaving behind, my plant babies.  Check out the updated photos and see my new idea for Organic Pest Control, namely to try to keep the snails and slugs from eating my green leafy plants that they love so much (well, Mr. Slug, I love ‘em more!).  I usually buy a TON of cheap eggs, crack ‘em, throw out the egg, bake the shells and crumble them all around my plants for this purpose (EXPENSIVE) but recently thought to try using sand.  Snails and slugs have soft little bellies and don’t much care for the scratchiness of the egg shells OR of sand, or so I’m hoping!  Living right on the beach, sand is something that I have plenty of & this would be GENIUS of me if it works!  I’ll keep ya posted.

So yeah, all that white stuff in my garden is sand.

Image

Image

Image

My Haricot Verts are my pride and joy of this year crop.  They grew beyond my wildest dreams and are producing beautiful beans already, just neigh of 6 weeks in and sown from seed.

Image

I keep my tomatoes in separate boxes and pots as last year they picked up a fungus and even though it was getting close to the end of season anyway, it was still sad to see how quickly they died off.  The fungus started with one plant and quickly spread to all the plants.   They went down, just like dominoes.  So I got smart this year and am keeper these guys in “segregation”.  If one get’s “sick” I can easily get it out of there before it contaminates it’s neighbor.  Or so goes my plan.  Again, wish me luck!

Organic gardening is so experimental.  It takes passion, dedication and some good old fashion luck!  This year, thus far, luck is on my side!

BG xx

UPDATE:  The sand experiment worked!!!!  Putting sand all around your green leafy vegetables that the slugs love to munch on WILL keep them from doing so!  Slugs 0 – Me 1!!!!  Of course, this is only really helpful to those of you whom live on/near a beach in which to get yourself a wheel barrel full of sand in the first place!  

Bikini Gardening 2013-2014: The Beginnings

Image

(Picture features, from bottom up:  Beets, Marigolds [natural & pretty pest control, plus I actually use the flowers in my oils!  Did you know that Marigolds = Calendula?!?!!?], Spicy Mix Greens, Chives, Mesclun Greens, Jericho Romaine, Arugula.  ALL NON-GMO & Organic seeds, sadly not an easy find in today’s Monsanto dominated North America. BOOOOOOOOO Monsanto, BOOOOO!!!!!  Top left is my Lavender experiment.  While they still smell FANTASTIC, I do not know if they will flower down here in this heat.  Stay tuned! And outside the box are two more boxes of tomatoes, cherry and heirloom.  A Lot of Rosemary and many more flowers [in whatever vessel I can get my dirty little hands on, yes, even old tires] that I just planted, and Aloe Vera, this girl LOVES HER ALOE VERA…)  More pics to come, promise!


So, as many of you know, I live in the Bahamas and November, or the end of Hurricane Season, marks the beginning of my Gardening Season.  With that said, Please be patient with me!  My creative brain is currently centered in the Earth, with my little plant babies and not so much on writing and on my computer.  I want to be outside with my babies!  I write more in the summer months, when I’m stuck indoors as it’s too hot to be out there, and write less in winter when the weather cools down and I can be outside again.  My Gardening Season is upon me and I’m happier than a “bug in a rug” or a “pig in mud”!  But I’ll post lots of pics and still write when I feel inspired.  SO now you’ll get to see what got me started on this whole “Bikini Gardener” venture, an actual LOVE of all things Mother Nature inspired by what I can actually grow & create myself!  


Uplifting Cold & Flu Bath Oil

With the change of seasons comes a change of weather and for many of us that brings on the dreaded Common Cold and/or Flu Bug.  Ugh!!! This is my go-to oil blend when I fall victim to the elements and get sick.  It helps relieve aches and decongests my sinuses and even seems to hold the power to chase away that “funk” that seems to accompany head-to-toe misery.  This oil blend refreshes and energizes all five senses and doubles as a great deodorizing foot massage oil for tired, aching feet.

Image

(I couldn’t find my Roman Chamomile Essential Oil, so I included German Chamomile instead, for picture’s sake.  For those curious of the differences found between the two, German vs. Roman Chamomile, here’s a link to help soothe your curiosity: http://www.essentialoils.co.za/essential-oils/chamomile.htm)


Recipe:

3 Teaspoons Jojoba Oil

3 drops each of the following Essential Oils:  Roman Chamomile, peppermint, rosemary, and eucalyptus

Combine all ingredients in a small glass bowl.  Stir mixture vigorously to blend.  And yes, that is it!

Image


Application Tip?  Add to your bath water while you’re running the tub, it blends through the water better this way and allows more time for the invigorating scents to raise and mingle in the air.

To Use as a Foot Massage Oil:  Simple massage your clean feet (um, or better yet, have someone else massage them!) for 15 minutes, put on some socks to help fully absorb the oils and climb into bed.  This oil will really help to soften tough, cracked and dry skin.

I recommend this oil for all skin types except those whom know themselves to be sensitive to everything.   This recipe takes no time at all to make and can make all the difference in the world to you both mentally and physically when feeling “under the weather” so to speak.  Feel free to double, triple, even quadruple the recipe in size as this recipe is only a one-time application but can totally be stored in a glass jar or bottle for future use up to one year.

I wish you well and healthy always, reader, but should you find yourself with a head cold or the flu with the changing of seasons, I do hope that my little bath and or massage oil blend will help get you back to your happy, glowing self in no time flat.  Be well!!!


Love thy Self, & Love the Skin You’re in!!!

BG xx

Spinach for Beautiful Skin!

Image

Does Spinach make you think of Popeye?  Remember that bald little muscly guy,  and just how much he loved spinach? And how it made him really strong? Well spinach IS good for your body – but it’s also great for your skin! It is packed with antioxidants and minerals including protein, iron, calcium, Vitamin A, Vitamin C, Niacin, Phosphorus, Thiamin, Potassium, and Magnesium, just to name a few.   Keep reading and learn of some other amazing information on Spinach!

  • UV Ray ProtectionSpinach contains Vitamin B which protects the skin from dangerous UV rays that cause sun damage, skin cancer, and premature aging of the skin.
  • Vegetable of Youth – Studies have shown that eating spinach regularly will keep you looking younger longer! It slows down age-related degeneration and stops premature aging of the skin.
  • Clear ComplexionRich in Vitamin K and Folate, spinach helps to give you clear skin, minimizing acne, bruising on the skin, and dark circles.
  • Keep it Raw – The best way to eat your spinach is raw. Cooking spinach can kill some very valuable nutrients in the vegetable and that’s not good!  Add spinach to a salad, on a sandwich, on sliced tomatoes with mozzarella cheese and basil, on top of entrees, blended into a smoothie, etc.
  • The Most Beneficial Way to Enjoy Spinach – In a smoothie. Why you ask? Well, apparently simply chewing the leafy green vegetable does not allow us to break down the vegetable well enough.  Spinach’s cell walls need to be broken down completely for  vital/essential enzymes to be released and absorbed into the body appropriately. The best way to accomplish this is by blending it in a blender and enjoying it in a smoothie.
  • Glowing Skin – Spinach will add a beautiful glow to your skin! Thanks to all of the amazing antioxidants and nutrients in spinach, it will even out  your complexion and leave your skin looking radiant.

A Delicious Spinach Smoothie Recipe

1 cup of clean water

1 cup of ice cubes

2 cups of organic spinach

6 organic strawberries (no stems)

2 stalks organic celery

Freshly-squeezed juice from an organic lemon

1 ripe medium-sized banana

Blend the water and spinach together first, then add in the other ingredients slowly until well blended in the blender. Feel free to add in almond butter, peanut butter, or whatever else you like for added benefits. Enjoy a smoothie every morning and your body and skin will thank you for it!


Love thy Self, & Love the Skin You’re In!

BGxx

Healing with Calendula

Image

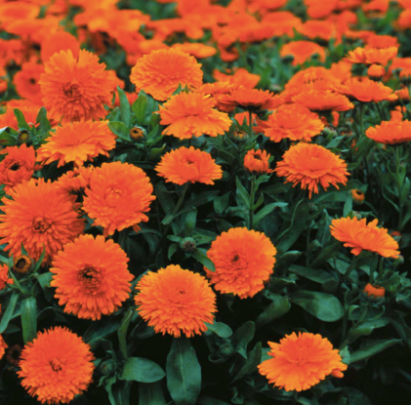
Calendula is one of my very favorite herbs, yes I said herb.   Its cheerful orange and yellow blossoms look gorgeous in the garden and have incredible healing properties.  Calendula officinalis, also known as pot marigold or garden marigold, has been used for centuries to heal wounds & treat skin irritations. Calendula has anti-inflammatory, antimicrobial, astringent, antifungal, antiviral, and immune-stimulant properties making it useful for disinfecting and treating minor wounds, conjunctivitis, cuts, scrapes, chapped or chafed skin, bruises, burns, athlete’s foot, acne, yeast infections, bee stings, diaper rashes, and other minor irritations and infections of the skin. Plus, it stimulates the production of collagen at wound sites to help minimize scarring and assist with stretch marks.  Crazy, right?!?  This versatile botanical can be incorporated into baths, creams, compresses, washes, salves, ointments, massage oils, baths, facial steams, tinctures, and teas. It is also gentle enough to use for babies, children, or animals. Internally, gargling with Calendula infused water may ease a sore throat, sores in the mouth, and inflammations in the mouth and throat.

Not only is Calendula a wonderful healing and medicinal herb, but it is also a lovely and useful plant in the garden!  Calendula repels many common garden pests including aphids, eelworms, asparagus beetles, and tomato hornworms, and is a companion plant for potatoes, beans, and lettuce. Plus, it grows quickly and is easy to cultivate from seed.  Now do you see why this is one of my fav herbs?!


Calendula Infused Oil

 Image

Image

This medicinal oil is simple to prepare and has so many uses. The gentle, soothing, and healing oil is perfect for cradle cap, diaper rash, chapped or chafed skin, bruises, and sore or inflamed muscles. The oil can be used alone, or incorporated into salves, massage oils, lip balms, ointments, creams, and lotions.

There are two methods to making Calendula Infused Oil, the Solar or Folk Method or the Stove-top Method.  I prefer the Folk Method, I like the old school, traditional ways.  Either way, all you’ll need is:

  • Organic Olive oil

  • Organic Calendula flowers


Solar/Folk Method:  Place Calendula flowers in a clean, dry glass jar. If using fresh Calendula, wilt flowers for 12 hours to remove most of the moisture (too much moisture will cause the oil to go rancid) before adding to the jar.

Pour olive oil into the jar, making sure to cover the flowers by at least 1 inch of oil so they will have space to expand. Stir well and seal the jar tightly.

Place the jar in a warm, sunny windowsill and shake to mix up the oil at least once a day, more if you think to.


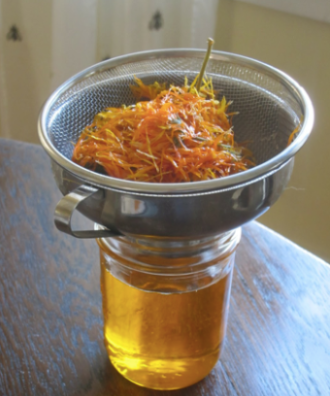
After 4-6 weeks, strain the herbs out using cheesecloth. Pour the infused oil into glass bottles and store in a cool dark place. 

Stove-Top Method:  As I said above, I prefer to infuse oils utilizing the solar or folk method described above, but when I first started making my own Calendula Oil, I used the Stove-Top Method, it’s quicker & my patience had not quite blossomed yet (ha! See my pun there?). To prepare, follow step 1 from above, but place the Olive oil and Calendula flowers in an uncovered thick-bottomed medium-sized saucepan. Warm over low heat at approximately 100 degrees F for at least 12 hours,  & the longer the better.  Just make sure to check the temperature occasionally to ensure that the oil isn’t getting too warm, you never want this to boil, ever.  Once the oil has infused, strain out the herbs using cheesecloth and store the infused oil into glass bottles or in my case, a large mason jar. 


Calendula Salve

Image

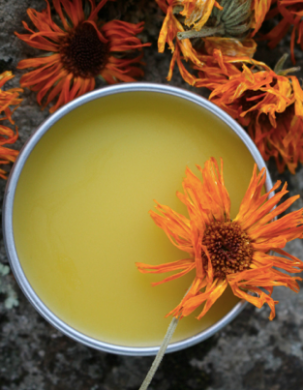
A soothing and healing salve. Rub into sore or inflamed muscles, apply to minor cuts, scrapes, insect bites, rashes, diaper rashes, stretch marks, chapped lips, chafed skin, bruises, and other skin irritations.

  • 4 oz. Calendula flower infused herbal oil (from above recipe)

  • ½ oz. Beeswax

  • 20 drops organic Lavender essential oil (optional)

Coarsely chop the beeswax or use beeswax pastilles (soooo much easier but hard to find).

Melt beeswax and Calendula oil over a double boiler. 

Once melted, remove from burner and stir in the Lavender essential oil.

Pour into tins or glass jars.

Allow to cool thoroughly before using or placing caps on the jars.


Calendula & Shea Butter Lip Balm

Image

This nourishing lip balm is made from healing ingredients, which soothe dry and chapped lips.

  • 1 Tablespoon Shea Butter

  • 3 Tablespoons Calendula Herbal Oil (from above recipe)

  • 1 Tablespoon plus 1 teaspoon Beeswax
  • 
10-15 drops essential oil of choice

  • A few drops of Vitamin E Oil

Coarsely chop the beeswax or use beeswax pastilles.

Place beeswax, shea butter, and oil in a small pot or glass Pyrex measuring cup and gently heat in the top of a double boiler until the beeswax and butter has melted.

Once melted, remove from the stovetop and stir in the essential oil and Vitamin E Oil.

Immediately pour the mixture into lip balm tubes or small containers.

This recipe will make approximately 1.5 oz. of lip balm, enough to fill 10 lip balm tubes, 6 of your 1/4 oz. plastic jars, or 3 1/2 oz. tins or plastic jars.


Calendula Tea

Image

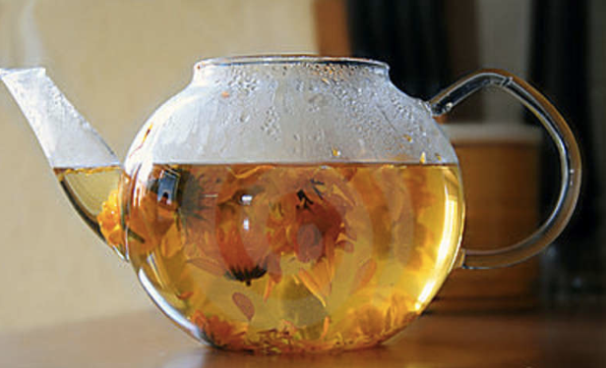
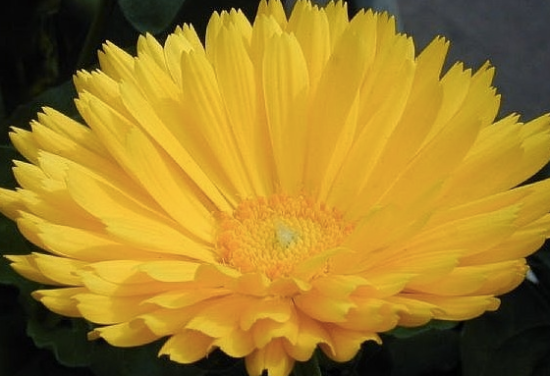
I love Calendula Tea .  It is a health and immune system booster.  The same component of the calendula flower that gives it its bright orange color is beta-carotene, also found in carrots. Because of this, it has many of the same basic health benefits and is high in vitamin A. The flowers of the calendula plant also contain essential oils and sugars that are known to stimulate the immune system, making calendula tea ideal to drink when you think you are coming down with a cold, or to speed healing.

But to be honest, I really use Calendula Tea to help ease the pain of Menstrual Cramps.  During that time of the month, Calendula Tea becomes my BFF.  The flavonoids found in this herbal remedy can reduce inflammation, and alleviate hot flashes as well!  Its relaxing and soothing and pretty.  I love my Calendula Tea. 

I always have dried Calendula on hand as I use it all of the time in my “potions”.  I simply throw a few pinches of dried Calendula petals into a pot and make tea, but they do sell Calendula Tea in proper tea-bags.  I add a bit of honey, it’s a wee bit bitter without.  Check your local health food store, I bet you’ll find Calendula Tea there.  Or start growing  &  drying your own, or buy bags of it.  I always love Mountain Rose Herbs for all of my herbs, butters, oils, etc.  They are a good, reliable and sustainable source.


* moutainroseherbs.com


Calendula, yeah, the Marigold, who knew?!?!!?  Well, our ancestors did, back when things were considered to be of beauty for their function and not just for their appearance.  Folk Medicine has long touted the plant for its anti-inflammatory, antimicrobial, astringent, antifungal, antiviral, and immune-stimulant properties, it seems that we living in the modern day need to catch up! Calendula’s versatility has proven itself to me time and time again and earned its way to my top spot for “Favourite Herb”.   They’re easy to grow and cheap to buy.  Get on the Calendula Bandwagon.


Love Thy Self, & Love the Skin You’re In!

BGxx

Flaxseed Face Mask

Image

Ingredients:

3 Tablespoons Finely Ground Flaxseeds

1 Tablespoon Raw, Organic Honey

¼ Cup of Clean Warm Water

Prep:

Combine the three ingredients in a small mixing bowl until you have a good paste-like consistency. Apply the face mask to your clean face and neck and leave it on for 25 minutes. Rinse off with warm water and gently pat dry with a soft hand towel. Follow with an all-natural moisturizer on your face and neck for added hydration, or do as I do and use beauty oils such as Argan Oil, Evening Primrose Oil, Pomegranate Oil, Rosehip Seed Oil, etc…

Benefits:

Flaxseeds are beneficial to your body, inside and out. They are rich in Omega-3 Fatty Acids, which are essential fats needed for your body to maintain good health. For this face mask, the flaxseeds are a wonderful gentle exfoliator for your skin, gently sloughing off layers of dead skin which if not exfoliated away, can leave your pores clogged with excess oil and acne-causing bacteria. It’s important to gently exfoliate dead skin cells away at least 3 times a week.

Raw, Organic PURE Honey contains amazing antioxidants proven to help reduce impurities from the skin and help battle mild acne. It also helps restore skin’s texture due to its anti-microbial properties, and will help repair skin damage from the sun and daily environments.


Love thy Self & love the Skin You’re in!

BG xx 

Fight Acne with Food!

Image

Increasing your antioxidant intake will do wonders for anyone suffering with acne issues. So it’s time to start your own garden!  I know, I know, not the right season, you live in an apartment/condo, etc., etc.  Ok, so short of growing your own ORGANIC produce, I guess it’s time to make a visit to the produce department at your local supermarket. Fruits and vegetables are an excellent source of antioxidants. Besides the fact that increasing your antioxidant intake is just an overall great idea for EVERY REASON relating to holistic health & beauty, for the purpose of this post, the purpose of increasing your antioxidant intake is to flush out toxins and repair damaged cells.  By improving your body’s healing potential, you will be helping your body rid itself of acne and the factors that are causing your acne, faster by fighting bacteria that can settle on and in your skin.

When you’re trying to get rid of acne quickly, it’s best to eat foods that are as close to their natural state as possible, yes, that means eating Raw whenever and wherever possible. Cooking fruits and vegetables causes them to lose much of their nutritional value as heat kills off most, if not all of your food’s natural enzymes. Also, whenever possible, opt for organic foods (Obvi!). They will be free of preservatives and additives that totally  contribute to a poor complexion.

So go now, go make yourself a fresh smoothie.  Here’s a great recipe for one of my acne fighting favourites:


Sour Apple Smoothie

Image

Ingredients:

1 Granny Smith green apple (cored and chopped)

1 banana

1 cup orange juice

1 cup vanilla Greek yogurt (organic is preferred)

½ cup fat-free milk (organic is preferred)

1 tablespoon of flaxseed oil

Prep:

Blend all the products together until smooth and enjoy!

Benefits:

Apples contain a high level of glycolic acid, which will help minimize scarring from acne, & reduce the appearance of fine lines and wrinkles. The glycolic acid also stops oils and bacteria from getting trapped under the skin’s surface. Glycolic acid is found in a numerous amount of skin care products, um, but here’s an idea:  why not try ingesting it through a smoothie?

Bananas are rich in potassium and Vitamin C and are known to improve digestion, allowing the body to break down food and rid the body of stomach problems. Bananas will improve your skin’s texture and help make/keep it pimple-free!

Raw almond butter contains a high level of Vitamin E, which is known to help repair skin from sun damage, scarring from acne, and also aid in minimizing the appearance offline lines and wrinkles. The antioxidants in almonds also help fight off free radicals, fighting bacteria that cause acne.

The dairy in this smoothie will help calm your skin of any redness or irritation that may develop from acne or other skin issues including psoriasis, eczema, and dry skin.

Orange juice is packed with Vitamin C and will improve skin color and texture, leaving your skin fresh and glowing!

Flaxseed oil is rich in omega-3 fatty acids and helps to regulate your body’s oil production, in turn, reducing the oils that surface on the skin, which in turn reduces the occurrence of clogged pores and breakouts.


So there ya have it, Readers!   We may not be able to grow all of our fruits and vegetables but we can certainly do our best to increase their intake.  Remember to eat your fresh produce ORGANIC & RAW whenever possible, thereby maximizing your anti-oxidant count & helping to keep your skin and your body happy, healthy, beautiful & glowing.


Love Thy Self, & Love the Skin You’re In!

BG xx

Beauty Benefits of Grapeseed Oil

Image

Grapeseed oil has emerged as an ideal oil to use as a facial moisturizer, it carries many beauty benefits and is a lot cheaper than Argan Oil (plus, the Argan Nut producing tree, the Argania Spinosa is very slow growing and it just can’t keep up with the West’s demand, so we’ll be running out and it’s price will keep getting higher). There are many commercial products on the shelves that contain Grapeseed Oil, but a cheaper and more effective way of using it is to simply use the oil on its own.

This nutrient-rich oil is derived from grape seeds. It is high in Vitamin E & rich in antioxidants and OPCs, otherwise known as oligomeric proanthocyanidin complexes. The benefits of grapeseed oil for your skin include anti-aging benefits, supple skin, and an even skin tone. While it works well for most skin types and rates at ZERO on the Comedogenic Scale, meaning it won’t clog pores causing acne, and it is a very thin oil with a  high absorption rate, grapeseed oil may still prove to be too greasy for more oily skin-types.  I think Grapeseed Oil is worth giving a shout-out to because it’s relatively inexpensive compared to over-the-counter skin products and definitely a heck a lot more affordable and accessible than Argan Oil. Try Now Foods, Grape Seed Oil, $5.10, amazon.com, and keep your skin hydrated.

Moisturizer

Grapeseed’s oils mimic sebum in the way that they hydrate the skin. Oily skin has the benefits of sebum, but dry skin does not. To use grapeseed oil as a moisturizer, simply slather plain grapeseed oil on your skin once or twice per day, a little goes a long way here, so start with about a quarter-sized portion and if you find you need more, use more!  Another option is to put five or six drops into your favorite skin cream to give it an extra boost.

Anti-Aging

No one is exempt from free radicals.  They are found in pollution and in the environment in general, and are a major cause of premature wrinkling.   One way to combat free radicals is with antioxidants, and grapeseed oil is chock-full of antioxidants. Using it daily–or several times per week–can help prevent fine lines and wrinkles.

Skin Tone

Grapeseed oil rivals vitamin C in the potential for evening out your skin tone. Vitamin C serums are popular for getting a clear, even skin tone but can be very, very pricey.  Instead of using a pricey serum, try using just plain grapeseed oil on your face before bed.  If you have really dry skin, like me, feel free to put some on in the morning too but if you have oily skin, I’d advise avoiding using grapeseed oil during the day.

Love thy Self, & Love the Skin You’re In!


BG xx


Skin Care in Your Kitchen: Part 7

I began my whole “Bikini Gardener” Mother Nature Inspired, Organic, Homemade Skin Care venture out of a love for gardening and all things holistic beauty.  There are just too many people out there who don’t know that they have such WONDERFUL stuff for their skin right in their very own kitchens.  We don’t NEED to go anywhere or to buy pretty packaged bottles of whatever to get gorgeous skin!  We just need to eat right and learn a few tricks of the trade!  This series of posts will be all about foods you’ll likely have at any given time right in your very own kitchen.

For Part Five of our Skin Care in your Kitchen Series I am featuring my grocery list and the beauty wonders that double as wonderful foods that are often on it.  When I go grocery shopping, I’m always sure to grab foods that can double in my DIY skin care ventures.  Not only do they make great additions to your weekly menu, they are also packed with skin and hair friendly ingredients.  Here is a list of food products that double as one-step wonders in the Homemade Skin Care world:

 Avocado a ready-made, preservative-free remedy for dry skin, split hair ends, and rough cuticles.

Image


Baking Soda-  makes a great face and body scrub when mixed with olive or any other cold-pressed veggie oil; can also be used as your grainy exfoliating filler in facial masks; when added to bath water, it softens the skin.  It is also a great abrasive and whitener to use in your DIY All-Natural Toothpaste recipes.

Cocoa great face mask ingredient and hair rinse ingredient for dark hair.

Image


Coffee  the contents of your coffee filter can be used as a body scrub; very strong brewed (cool) coffee is a great rinse for dark hair.

Corn flour soothing, tightening, & mildly exfoliating agent for masks and scrubs.

Eggs can be massaged into the hair as a nourishing conditioner; egg whites are a traditional face lifting mask ingredient.

Image


Epson Salts great as a relaxing bath agent that will soothe itching skin and relieve sore, aching muscles.

Chamomile Teacan be used as a toner, hair rinse for blonde hair, and a general purpose calming hair and skin mist.

Green Tea a great all-purpose skin toner, face mask and scrub agent, eye soother, and a baby skin rinse if your little one suffers from eczema.

Honey anti-bacterial, anti-microbial and anti-fungal, honey is a great face mask ingredient, blemish fighter and cure for dandruff- just add some honey to your shampoo

Image

Lemons lemon juice is a great skin brightening and hair-lightening treatment, it also provides a collagen boost and naturally exfoliates the skin; the rind can be used to pep up your bath water; oil squeezed from the rind is acne-fighting.

Image


Mayonnaise– a fantastic moisturizer for the face, body and especially feet.

Milk– use to wipe your face after cleansing for a mildly exfoliating effect; add to bath water to soften the skin; rinse you hair with milk for added volume and to combat dryness.

Vegetable Oils– should be your number one beauty ingredient.  Vegetable oils can be used as your face & body moisturizer and as bath & massage oils.  Great skin-friendly oils to explore include grapeseed,  coconut, almond, rice bran, hemp, castor, jojoba, avocado, apricot kernel, safflower, pumpkin and sesame.

Image

Sea Salt– works great as a face and body exfoliant and is especially useful for an instant manicure.  Look for very fine sea salt, which will not damage your skin, my personal fav is Celtic Grey Sea Salt in super fine.

Sugar– both white and brown sugars can be used for face and body scrubs, but white is higher in Glycolic acid, which is great for the skin.

Oatmeal– useful as a skin scrub, in face masks to soothe skin irritations and in bath water.

Tomatoes– revive tired skin and hair to help it look shiny and smooth.

Image

Yogurt– works really well as an exfoliating face mask to combat dry, itchy scalp.


So there you have it, readers, what’s on your grocery list?    


Love thy Self, & Love the Skin You’re in!

BG xx


Banana & Honey Face Mask

Image

Ingredients:

1 Ripe Banana

3 Tablespoons Pure Honey

Prep:

Peel and mash the banana with a fork in a mixing bowl. Once the banana is no longer chunky and is of a smoother consistency, stir in the honey and mix together. For easier mixing and before adding into the banana paste, warm the honey for a few seconds in the microwave but make sure it’s not hot. Once blended well together, apply the face mask to your clean face and neck. Leave on for 25-30 minutes then rinse off with warm water & gently pat dry with a soft hand towel and follow with an all-natural moisturizer of your choice, or beauty oils = my choice!

Benefits:

Bananas are not only delicious to eat but are wonderful for your skin as well! They soothe dry, irritated, and inflamed skin when applied topically to the surface of the skin. The most sensitive of skin types should be able to handle this mask as long as you are not allergic to either ingredient. Bananas are beneficial in fighting acne and are rich in potassium, which when applied directly to the skin, will suffocate the bacteria in cells, forcing blemishes to heal more quickly. Bananas have many anti-bacterial properties, which can reduce swelling and infections from other skin issues, including Psoriasis, Eczema, and even painful bug bites. You can even rub the peel of the banana on your skin for these types of skin conditions and it will help soothe your skin tremendously.

Bananas are also loaded with Vitamin C and other anti-oxidants which, when applied to the skin (even the peel), can help reduce fine lines and wrinkles. Blood flow will circulate better and collagen production will be boosted.

Honey is a wonderful antioxidant proven to help reduce impurities from the skin and help battle mild acne. It also helps restore skin’s texture due to its anti-microbial properties, and will help repair skin damage from the sun and daily environments. Enjoy this mask to the fullest…you and your skin will love it!


Love thy Self & Love the Skin You’re in!

BG xx