I swear, I have the driest skin on the planet. In my previous life, you know, the one where I bought skin care products off of store shelves, I would apply store bought lotions and creams that promised 24 hour moisture & protection but alas, they NEVER held up to their word. My skin drinks in moisture and constantly begs for more… Do you have really dry skin? Or are you simply interested in learning to make your own face, hand &/or body lotions? This article is for you. I will tell you all that I know on the process, the basic formula and it’s many ways to adlib/get creative, and all of the differing carrier oils that you can use and why you may care to choose one over the other.
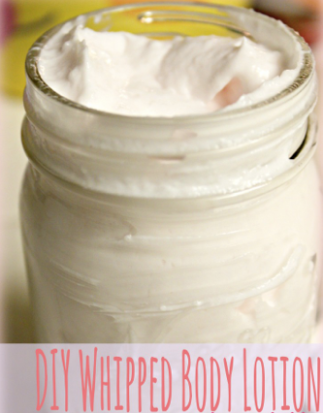
I drink tons of water/liquids, I really, really do, plus I take my Omega 3 Essential Fatty Acids and still my dry skin persists! In the winter months I use body butters, but in the hotter summer months, I like lotions better. The difference? Butters are full fat based (all oils), lotions are water based (water & oil). Butters are thick, like really thick, you have to dig into it, much like actual butter (yeah, like you eat on bread), whereas lotions are lighter, more like the consistency of mayonnaise. Butters have to be worked into the skin and are heavily greasy (not that this is a bad thing! The oils absorb and are fantastic for your skin, they just take some coaxing). Lotions on the other hand, being water based, are lighter, more easily & quickly absorbed into your skin. It’s summer, I’m a lotion girl all the way now and I LOVE making new lotions and teaching others just how to do the same. Now it’s your turn! Keep reading…
At it’s most basic a lotion need only contain water, oil and beeswax. These three ingredients alone, called the water phase, oil phase & emulsifier, will make a simple, yet good lotion but there are many forms of water and oil that you will need to decide upon to get started. Lets cover the water choices first.
You can simply use Purified Water if you want to keep your lotion at its most basic and scent/botanical free. Or you can choose to use an Organic Tea with beautifying properties, or a Botanical Water/Hydrosol, or Aloe Vera Juice or Gel. Or a blend of the above! I always add a little Aloe Vera Gel to whatever “water” I decide upon for extra hydrating and skin-soothing properties.
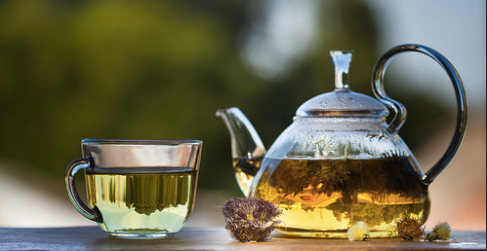
Organic Teas Suggestions: These are just suggestions! You may have your own favourite or do your research and choose others if you wish!
- Chamomile Tea– It has an incredible number of benefits, and none more so than for our skin. Alpha-bisabolol – a compound found in chamomile – reduces the appearance of fine lines and wrinkles by accelerating the healing process of the skin while also possessing anti-irritant and anti-inflammatory properties. It is gentle, soothing & my favourite for use in Baby Lotions or for anyone looking for a gentle, soothing water base to use in their lotion making, great for sensitive skin or those with eczema.
- Green Tea– Green tea contains loads of antioxidants and anti-inflammatory compounds making it perfect to protect our skin. Chalk full of anti-oxidants, this tea is a no-brainer for a good choice in lotion making especially if you’re goal is anti-aging & fighting off those nasty free-radicals.
- Red Rooibos Tea– This herb from South Africa has been used for centuries to help keep the skin radiant and beautiful. The herb contains an abundant amount of nutrients in it that are beneficial to the skins health such as phenolic compounds, flavonoids, alpha-hydroxy acids, zinc, magnesium, iron, calcium, potassium, copper, fluoride and manganese. The herb also has many medicinal properties in it as well such as anti-inflammatory, anti-bacterial, anti-septic, anti-viral and anti-mutagenic, which are all excellent for treating skin discomforts such as sunburns, acne, and rashes.
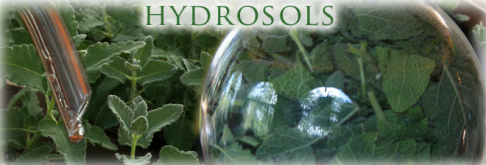
Floral Water/Hydrosol Suggestions: There are so MANY, so do your research if you don’t like my two favs. Find out which Hydrosol you like for scent and for it’s Botanical & Therapeutic properties and go with it!
- Rose Water– Distilled from rose petals, this is likely the most popular of all hydrosols. It has astringent like properties, tightening capillaries, reducing redness and blotchiness. Um, yeah, and it smells divine. Light, pretty and maybe even a bit like Grandma. I love my childhood memories of how my Nanny smelled, and I love Rose Hydrolsol. My fav lotion currently that I make is Coconut Rose, made with Rose Water & Coconut Oil. (I’ll include the recipe at the end!)
- Lavender Water– Um, maybe the second most popular hydrosol? Well, that or Witch Hazel… Lavender Water, ok, distilled from, you guessed it, da da da da, Lavender. Great for sensitive skin and all skin types alike. It’s gentle, smells FANTASTIC and contains high anti-septic properties meaning you’ll have fewer break-outs! It’s anti-inflammatory properties, reduce the redness and blotchiness of the complexion, leaving your skin-tone more even. It increases blood flow in the skin, meaning more nutrients are brought to the skin along with much needed oxygen to the cells. This is essential to healthier cells, and benefits more frequent cell turnover. All of these essential skin benefits work together which makes for glowing healthy looking skin which we all want.
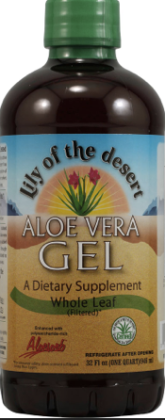
And don’t forget Aloe Vera Juice or Gel! Aloe moisturizes the skin without giving it a greasy feel, so it’s perfect for anyone with an oily skin complexion. Aloe vera gel contains two hormones: Auxin and Gibberellins. These two hormones provide wound healing and anti-inflammatory properties that reduce skin inflammation. The Giberellin in aloe vera acts as a growth hormone stimulating the growth of new cells. It allows the skin to heal quickly and naturally with minimal scarring. As we age, everyone begins to worry about the appearance of fine lines and the loss of elasticity in their skin. The Aloe Vera plant leaf contain a plethora of antioxidants including, beta carotene, vitamin C and E that can help improve the skin’s natural firmness and keep the skin hydrated. Aloe is also very soothing and can reduce skin inflammations, blistering and itchiness, while helping the skin to heal more rapidly. Additionally, in Ayurvedic Medicine, aloe is used to effectively heal chronic skin problems, such as psoriasis, acne and eczema. GENIUS STUFF! I add aloe vera gel to every single one of my water phases in each and every lotion that I make, at about a quarter of the total water phase formulation.
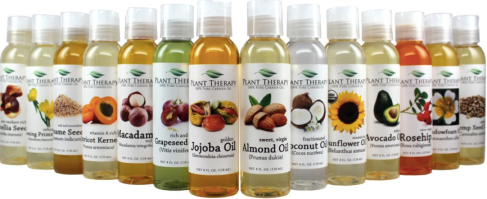
Carrier/Base Oils– Ok, so there are plenty of Carrier oils (your base oil) to chose from, all with differing cosmetic & therapeutic properties, so choose one or more to mix according to your skin type and desired purpose. I’ll go alphabetically:
- Apricot Kernel Oil– Rich in EFA’s (Essential Fatty Acids), used most specifically for sensitive skin and mature skin. Homemade natural skin care cleansers and moisturizers using Apricot Oil should be made in smaller batches or stored in the refrigerator to extend usability. I use this oil a lot in anti-aging lotion recipes, it’s great for mature skin types.
- Avocado Oil– A thicker oil, rich in amino acids, lecithin, vitamins and minerals. It also contains pantothenic acid (B5), which has been used successfully to treat skin conditions such as rosacea and acne. Since it is so thick, however, it needs to be used in a low ratio in a blend (10%). Avocado oil is a nourishing oil for both skin and hair.
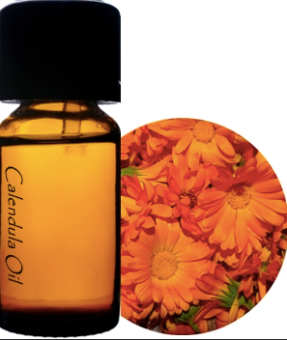
- Calendula Oil– One of my favorite remedies for healing damaged skin. Rich in antioxidants, it also offers antiseptic and antibacterial properties as well as being anti-inflammatory. It helps heal cuts and scrapes and is effective on rashes, eczema, burns, and dry, chapped, or cracked skin. One of the best uses for calendula oil is for diaper rash, where it works miracles for healing tiny tushes and is a good ingredient in regular skin care formulas for its anti-aging properties and to promote healthy skin.
- Castor Oil- Considered a “miracle” oil, castor oil is actually a triglyceride of fatty acids that is anti-microbial and actually aids in the removal of toxins by increasing the lymphatic action. Taken orally, it can help reduce toxins in the same way. Skin healing and hydrating, without a greasy feel (when used with a light touch, this oil is used in natural skin care for anti-aging formulas, or all by itself. Great for around the eyes!
- Coconut Oil– Un-Refined, Raw coconut oil is one of the mildest base oils, and suitable for healing salves as well as sensitive, irritated or inflamed skin. This natural oil is popular for soap-making, as well as creams and lotions. It has a high Lauric acid content, and is high in anti-oxidant E. It has a bit higher comedogenic rating, so if you’re concerned about that, save this for wonderful body moisturizing! I use this the most. Almost all of my lotions and concoctions are either Coconut Oil or Sweet Almond Oil based.
- Evening Primrose Seed Oil- Evening Primrose Oil is anti-inflammatory, anti-oxidant and a blood vessel dilator. It’s an effective oil for acne, rosacea, aging skin, eczema, skin ulcers, and nourishing of the skin, scalp, hair and nails. The special characteristics of Evening Primrose Oil increases skin resistance to ultraviolet rays and aids in blood circulation. One of the best carrier oils for wrinkles but expensive, so at most I mix maybe 10% of EPSO in my base oil blend.
- Grapeseed Oil– Has a high absorption rate, and will not leave an oily feel. It is non-allergenic, non-comedogenic and one of the carrier oils used for sensitive, aging skin. This oil is especially good for collagen support and often used in anti-aging skincare, especially on delicate under-eye skin. If making facial lotions, this is a great choice!
- Hazelnut Oil- A thinner natural oil with astringent properties, Hazelnut can be used by those with an oily skin type. It will leave a slight oily film, which can be wiped with a warm cloth.
- Hemp Seed Oil– Hemp oil is high in proteins and essential fatty acids and is absorbed well into the skin. It helps to heal skin lesions, fight skin inflammations, and softens dry skin. It is an excellent anti-aging natural oil with moisture balancing properties, non-greasy and emollient, but it doesn’t smell great!
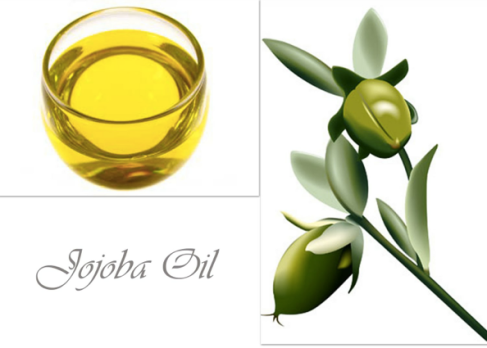
- Jojoba Oil– Jojoba is actually not an oil at all, but rather a wax ester extract of the seed of the jojoba tree that has absorption properties which are very similar to that of human skin, and is highly stable. This is a good, light choice for oily or acne prone skin, because is is non-comedogenic, and offers a light sun protection. Often used as a massage oil, Jojoba oil can soften hardened skin, and can help heal wounds and skin diseases. This is also expensive & thick, I use it in all of my facial lotions but only to a portion of 10% in the base oil.
- Kukui Nut Oil- Particularly good for dry skin, acne, eczema and psoriasis due to the high penetrability. It has a high essential fatty acid content that is soothing and nourishing. It is not highly stable, and can go rancid quickly, so keep formulations in the fridge!
- Macadamia Nut Oil– Anti-inflammatory and great for massage oil blends, but should be used in a low ratio. It has regenerative properties that have allowed it to be used successfully for treating scars, wounds, minor irritations and sunburns.
- Olive Oil– Olive oil is the most versatile of all the base or carrier oils for skin and hair, rich in vitamin E and anti oxidants. It is very stable, conditioning and soothing. Be sure to obtain a high quality, cold-pressed, extra virgin oil to avoid the strong odor and greasy feel of lower qualities.
- Palm Fruit Oil– Contains the highest amount of naturally occurring antioxidant vitamins A and E of any oil, so it has the longest shelf life of and does not need to be stabilized with any type of preservatives or additional antioxidants. The EFA’s with the highest percentage are Palmitic and Oleic. Highly stable to oxidation.
- Palm Kernel Oil– One of the two natural oils that contain the highest amount of Lauric acid, the other being Coconut oil. Lauric acid is believed to have anti-microbial properties, and is used mainly in soap-making where it produces a smooth feel. The other main fatty acids are myristic, oleic, and palmitic (to a lesser extent than in palm oil). High in saturated fats, it is relatively solid at room temperature, has low toxicity.
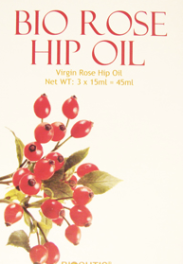
- Rosehip Oil– Rich in EFA’s, vitamins C and E, this is an expensive oil that can be used in a low ratio for treating many skin conditions, most notably dehydrated skin that has prematurely aged. Great for wrinkles!
- Safflower Oil– Safflower Oil has a superior skin compatibility, and due to it’s 80% linoleic acid content, increases the moisture content of the skin. It’s best to use an unrefined blend to get the most moisturizing benefits.
- Sesame Oil– This oil contains vitamins A and E and is great in a low ratio for massage blends. Sesame Oil also contains light protection from the UV rays of the sun, and is often used in natural skin care formulations for a natural sunscreen with a low SPF. Used in a lot of anti-aging recipes, I love this oil for mature-skin type product making.
- Sweet Almond Oil- This is one of the most commonly used base oils, rich in essential fatty acids, good for all skin types. Sweet Almond Oil is often used in massage therapies, as it is lightweight, mild and easily absorbed into the skin. As a base oil, it has a longer shelf life than some others because it is not easily oxidized. Great to include or use as the base for body lotions.
- Vitamin E Oil– Vitamin E promotes healing and helps in the reduction of old scarring. It is anti-oxidant, and often used as a preservative in natural formulations.
- Wheat Germ Oil– Wheat Germ oil is a high in vitamins E, A, and D, proteins, lecithin, and Squalene. It is great for cracking, wrinkles and chaffing. It has a higher pore clogging rating, so save it for areas that aren’t prone to acne, like the legs, arms and around the eyes if you have oily skin.
Emulsifiers/Stabilizers: Water and oil do not naturally combine. Oil will sit on top of the water. The only way to combine it is by emulsification, or blending it to force the water to combine with the oil, much like making mayonnaise. They will combine easier and stay together forever if you have an emulsifier. Emulsifiers lend to a nice texture, help bind the water and oil phase & help seal in moisture.
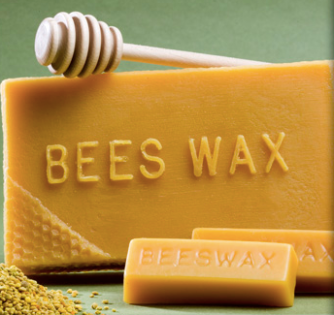
- Beeswax- Yellowish and sticky, Beeswax is made in the hives of bees & smells slightly of honey. You want to find an organic source. It has a melting point of 62-64C & is recommended that it is not heated above 85C as discolouration can occur. The pastilles are easier to work with but solid beeswax is fine & more commonly found, it’s just hard to cut! I boil water and pour it over a big knife to help slice through the beeswax easier and again to help clean the knife of wax. This was a seriously good discovery as otherwise, good luck!!!
- Candelilla Wax– A great vegan substitute for Beeswax as Candelilla is a Plant Wax, from the plant Euphorbia Cerifera, native to Mexico & parts of the USA. It is a hard yellowish wax with a melting point of 67-79C.
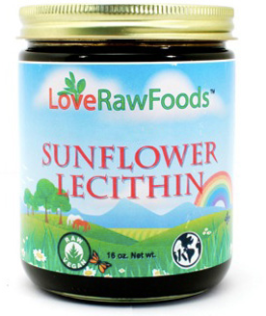
- Lecithin– Belongs to group of fat-like substances called phospholipids. These consist of fatty acids, glycerol and choline (vitamin B) combined with phosphoric acid & a touch of vitamin E. Lecithin is a bi-product of the process of extracting oil from soy and sunflower oil (I recommend using one from an organic sunflower source as soy is a mass GMO, or make sure that it is non-GMO and this can be hard to find in the current climate!) It is an emulsifier and thickener but also has therapeutic properties for the skin, as it carries nutrients and much hydration, it’s soothing & moisturizing. Use at about 5-10% of any formulation. (It comes in liquid or granules, you want the liquid!)
Ok, so there you have it, my lists and suggestions of what you can choose to use in your water phase, oil phase and emulsifiers for your own lotions. Those are your three basic phases and alone can & will make a fine basic lotion formula.
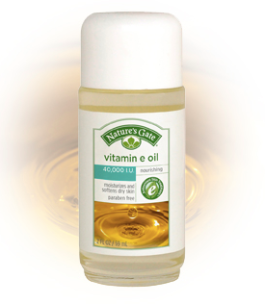
Additionally, you’re going to want add a preservative, albeit an all-natural one, but never add your preservative to mix more than 5% of your total formula. Though there are no true all-natural preservatives, Vitamin E & Rosemary Essential Oil will extend your all-natural product’s shelf life. Vitamin E Oil is so chalk-full of antioxidants that it will extend your product’s shelf-life by about 6 months. I use it in absolutely all of my formulations. It’s easy to come by and adds so many benefits to your potions but beware that while its high antioxidant levels will help keep the water & oils in your lotion from going rancid, they do not prevent bacteria growth, so take care when scooping out your lotions. Use a spoon or at least be sure to have clean hands! And store your lotion in a cool locale, not in direct sunlight. Many essential oils also double as all-natural preservatives, but of course, they also scent your product! So, although Rosemary is a great preservative, you’re not likely to want to be smelling like Rosemary all day/night long. Rosemary Extract & Essential Oil have very high antibacterial properties, so your product won’t grow bacteria but it can still go rancid if you don’t store it properly! Again, you’ll get about 6 months out of a product mixed with Rosemary Extract &/or Essential Oil. Remember, dark, cool location and CLEAN hands!
I make my own lotions because I don’t want chemical preservatives on my skin and in my body, but many argue that these chemical preservatives, i.e. Parabens, are safer in small doses than molds and bacterias that can grow in all-natural products, but to be honest, I’d rather take the risk of my lotion growing mold than slather myself with preservatives that may ultimately contribute to cancer. If you want to make something that is really all natural, you have to make it yourself, but only make small amounts of it so that you don’t have to throw it out if it does go bad over time or make however much of it as you want but store it in glass jars small enough to allow only about a month’s worth of consumption and then share or freeze the rest (that works, too)! Sharing’s my method of choice!
You are also likely to want to scent your homemade lotion with an Essential Oil. Just be sure to use a good source and then go to town with your bad self. Of course I have a few tips here, too. #1) Go sparingly! These can be very, very strong and over-powering and once added, can’t be taken out. Add a few drops, mix and test. Add more if you want more but always a few drops at a time and then test. Never add more than 5% of your formulation in essential oil. #2) Don’t scent blend all willy-nilly. This can end badly and ruin your entire product. HUGE Rookie mistake! Huuuuuuuge and I’ve made it myself. Know that what scents you’re mixing actually go together and in what proportions they do so. Plan ahead and do your research. #3) If using Chamomile Tea and or a Hydrosol, I like to stick with that same scent (i.e. Chamomile Tea water phase + German Chamomile Essential Oil, though Lavender E.O. is light enough & does work well with Chamomile; Rosewater water phase + Rose E.O, though Neroli & Jasmine are also both light enough and do blend well here). Mixing scents here can be troublesome, it just doesn’t always work and can tend to “complicate” the simplicity of an already worthy product. YOU HAVE TO DO YOUR RESEARCH ON SCENT BLENDING OR IT WILL LIKELY END BADLY.
Here’s a couple of links for info on scent blending that I often refer to myself:
http://www.lgbotanicals.com/assets/pdf/HarmoniousBlendsChart.pdf http://www.naturesgift.com/chords.htm
Alright, one more possible addition to our basic lotion recipe: Organic Vegetable Glycerin. Glycerin is a humectant consisting of fatty acid triglycerides that attracts and seals in moisture. It also acts as a natural preservative. I add this to most of my lotions for extra hydration and protection.
To summarize, to make a homemade lotion, you’ll need three components:
- Water Phase: water, hydrosol, organic herbal tea, etc.
- Oil Phase: vegetable oil, animal fats, silicones, waxes, etc.
- Emulsifier: beeswax, candelilla wax, lecithin, etc. Lotions with a special emulsifier are easier to make, have a better texture, and create a more stable emulsion so that the oil do not separate from the water.
Additionally, your lotion should (but does not have to) also contain all-natural preservatives, and you’ll likely want your lotion to contain the aromatherapy of essential oils, but this is of course optional.
A word on keeping Homemade Lotions:
- It is very important to make sure the product is protected from bacteria, so check that the container is thoroughly sealed & sterilized before using.
- Label the container with the date. This will help you to remember when the product was made so that you can be sure not to use the product past the 6 month safety date.
- Remove the lotion from the container with a spatula or spoon, not your fingers. Dipping your hands into the homemade lotion will cause it to spoil faster because of the spread of bacteria. And good Heavens, reader, if using your hands to get at your lovely Homemade Lotion, please make sure that they are clean!
- When you do create a homemade facial cream, you can freeze it by placing small bottles in the freezer. When you are ready to use it, you can simply defrost for a wonderful beauty treat!
IMPORTANT: Before you begin making any homemade product, make sure that you have thoroughly cleaned the area that you are working in. Wash your hands completely. Make sure to sterilize wash any dishes, mixing utensils, spoons, or other tools that you may use. This should be done when you begin creating the product, as well as afterward.
So now we will make a test recipe, so that you can better understand the technique of creating homemade skin lotions, I took the basic recipe I had to start with, so here we go.
Basic Hand or Body Lotion:
Ingredients:
- ¼ Cup Distilled Water
- ¼ Cup Carrier Oil
- 1 Tablespoon or 12 grams of Beeswax
Tools:
▪ Glass container (Pyrex measuring cup, Mason Jar, etc.)
▪ Double boiler
▪ Thick bottomed pan
▪ Spatula, chopstick, spoon
▪ Hand Mixer or Stick Blender
▪ Small glass storage container, apprx. 8oz. (I always choose glass containers over plastic, because plastic containers are not completely safe and can bring many harmful germs and bacteria to your skin.)
Instructions:
▪ sterilize all of the tools that you will be using: Spatula, spoons, jars (for storage) & lids, mixer whisks, etc.
▪ heat distilled water in a thick bottomed pot over LOW heat. You just want the water to be warm as it mixes better with the oil phase when both are warm.
▪ Place beeswax & oil in glass Pyrex or Mason jar and heat over medium heat in your double boiler until melted & combined.
▪ Remove Glass from heat and allow to cool a bit, to warm. Keep an eye on it though as you do not want the beeswax to start to harden at the top, blocking your ability to pour it out!
▪ Add warmed water to blender and blend on low for a few seconds.
▪ Slowly, through the whole in the top of the blender, start to pour in your warm oil mixture with blender going on low. You will see the mixture start to take form into your emulsion. Your blender may get stuck and stop really blending the emulsion at this point. It happens! Simply pour it out into your mixing bowl and continue to mix with your and mixer on low until it has fully formed your desired lotion texture. If your blender keeps blending then allow to do so until you see that your emulsion has reached your desired lotion texture.
▪ Transfer lotion to storage jar, seal and let set for a while until fully cooled.
So that is a Lotion Recipe at it’s most basic. There are no preservatives in this recipe so use it up quickly, and get the lotion out with a clean spoon, even keep it in the fridge if you desire. And let’s move on to another, slightly more advanced formula, shall we!?!
Coconut Rose Body Lotion
Ingredients:
- ½ cup Rosewater
- ¼ cup Aloe Vera Gel
- ½ cup Raw Unrefined Organic Coconut Oil
- ¼ cup of Sweet Almond Oil (or desired carrier oil)
- 2 Tablespoons or 24 grams Beeswax
- 1 Tablespoon of Glycerin (Humectant)
- 1 Tablespoon Pure Vitamin E Oil
- Rose Essential Oil (to desired scent)
Tools:
▪ Glass container (Pyrex measuring cup, Mason Jar, etc.)
▪ Double boiler
▪ Tea Kettle
▪ Spatula, chopstick, spoon
▪ Hand Mixer or Stick Blender
▪ 3 x 8 oz. glass storage containers, makes apprx. 3 cups (I always choose glass containers over plastic, because plastic containers are not completely safe and can bring many harmful germs and bacteria to your skin.)
Instructions:
▪ sterilize all of the tools that you will be using: Spatula, spoons, jars (for storage) & lids, mixer whisks, etc.
▪ Add Coconut Oil, Sweet Almond Oil, & Beeswax to your glass Pyrex or Mason Jar and heat over medium heat in your Double Boiler just until all is melted and combined.
▪ Heat Rosewater & Aloe Vera Gel in thick-bottomed saucepan over LOW. You do not want this to boil. You just want the water to be warm as it mixes better with the oil phase when both are warm, and that is our only purpose in warming it up. Warm, not hot.
▪ Remove Glass containing your oil phase from heat and allow to cool a bit, to warm, maybe 10 minutes. Keep an eye on it though as you do not want the beeswax to start to harden at the top, blocking your ability to pour it out. If oil is too hot you will not get your desired lotion texture.
▪ Add warmed water to blender and blend on low for a few seconds.
▪ Slowly, through the whole in the top of the blender, start to pour in your warm oil mixture with blender going on low. You will see the mixture start to take form into your emulsion. Your blender may get stuck and stop really blending the emulsion at this point. It happens! Simply pour it out into your mixing bowl and continue to mix with your and mixer on low until it has fully formed your desired lotion texture. If your blender keeps blending then allow to do so until you see that your emulsion has reached your desired lotion texture.
▪ Add Glycerin and continue to blend.
▪ Add Vitamin E & continue to blend.
▪ Add Rose Essential Oil, a few drops at a time and blend, until you’ve reached your desired scent level. Remember, a little goes a long way!!!
▪ Transfer lotion to sterilized storage jars, seal and let set for a while until fully cooled. *If oil was too hot, your Lotion will not form a proper lotion texture but don’t fret! Allow to cool further and mix again with your hand mixer/blender. IT WILL COME TOGETHER!!!
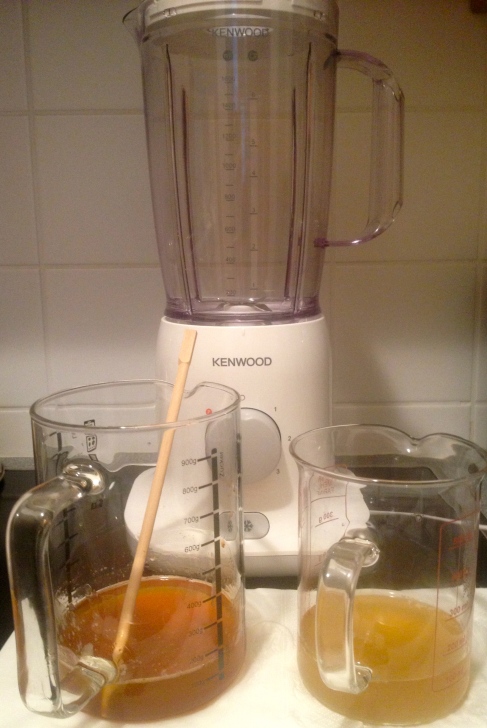
(Oil Phase on the left & Water Phase on the right cooling to warm before being added to my trusted blender to whip into lotion.)
There! YOU DID IT!!!! That wasn’t too difficult, was it? Care for one more? Perhaps a bit more advanced even? Here’s a recipe for a Facial Lotion with an SPF of 30 that I am currently loving & using everyday.
Green Tea & Aloe Facial Lotion SPF 30
Ingredients:
▪ ½ cup Organic Green Tea
▪ ¼ cup Aloe Vera Gel
▪ ½ cup Grapeseed Oil
▪ ¼ cup Jojoba Oil
▪ 1 Tablespoon or 12 grams Beeswax (stabilizer)
▪ 1 Tablespoon Lecithin (stabilizer)
▪ 1 Tablespoon Glycerin (humectant)
▪ 1 Tablespoon or 85 grams Zinc Oxide Powder *( be careful not to breathe when around this, to breathe out will make it fly everywhere, nor do you want to breathe it in either.) This is your SPF ingredient. (Functional)
▪ 1 Tablespoon Pure Vitamin E Oil (antioxidant/preservative)
▪ Essential Oil of your choice *OPTIONAL (& beware of choosing citrus oils as they increase your skin’s photosensitivity to the sun = counterproductive in a recipe with Sun Block, no? Maybe Lavender or Vanilla if you feel the need. I do not. I like the freshness of the Green Tea & Aloe alone, but that’s just me!)
Tools:
▪ Glass container (Pyrex measuring cup, Mason Jar, etc.)
▪ Double boiler
▪ Tea Kettle
▪ Electric Kitchen Scale
▪ Spatula, chopstick, spoon
▪ Hand Mixer or Stick Blender
▪ 3 x 8 oz. glass storage containers, makes apprx. 3 cups of lotion. (I always choose glass containers over plastic, because plastic containers are not completely safe and can bring many harmful germs and bacteria to your skin.)
Instructions:
▪ sterilize all of the tools that you will be using: Spatula, spoons, jars (for storage) & lids, mixer whisks, etc. ( I do so by boilng a big pot of water and submerging all tools to boil for about 10 minutes or so while thoroughly wiping down my work surface.
▪ boil water and make a very strong cup of green tea, leaving tea bag or leaves in cup until it is only warm. Remove teabag or leaves, keeping ½ cup of tea (drink the rest!) & add aloe vera. Keep warm, as adding oil and water phases works better when phases are both warm, not hot, not cold.
▪ While tea is steeping combine oil phase: grapeseed oil, jojoba oil, beeswax, lecithin, & glycerin in a glass Pyrex measuring cup or Mason Jar and heat over medium heat in a double boiler until just melted and evenly combined (I use a wooden chop stick to stir with as I can then throw it away and have one less thing to have to clean!)
▪ Remove from heat & add the zinc oxide now (remember to be careful to hold your breathe at this time) and stir to combine to heated oil phase.
▪ Allow to cool a while, you want your oil phase to be warm, not hot or you won’t get your desired texture. Stir often to combine zinc.
▪ Pour warm water phase into your blender and mix on low for a few seconds.
▪ With blender going, slowly pour in your oil phase through the whole at the top of your blender. You will see the emulsion slowly start to take form. Your blender may stop properly blending at this point as the lotion may be too think to blend properly. This sometimes happens. If it does, simply pour mixture into a medium mixing bowl and mix with your stick blender or hander mixer. If your blender continues to work then great.
▪ Add Vitamin E oil and blend for a few seconds.
▪ *Add essential oil(s) now if choosing to use them and blend for a few more seconds.
▪ Transfer lotion to sterilized storage jars, seal and let set for a while until fully cooled.
Well look at that! You’ve not only made a fantastic facial lotion, but it has an SPF of 30! You’re a natural! You brilliant, beautiful thing you!!!
*I buy almost all of my oils and all-natural products in bulk from Mountain Rose Herbs at:
http://www.mountainroseherbs.com/index2.html
But I also love From Nature With Love:
http://www.fromnaturewithlove.com
and New Directions Aromatics:
http://www.newdirectionsaromatics.com
Otherwise, I am constantly picking up products when in Health Food Stores, Farmers Markets and Ayurvedic Shops around the world.
Love Thy Self, Ladies, & Love the Skin You’re In!!!
BG xx


